Showing posts sorted by relevance for query garden. Sort by date Show all posts

Sunday, April 12, 2015

My Landscape Garden Essentials

I'm strictly a landscape gardener, and if you're thinking about starting a flower bed or two, there are a few essentials you may want to consider. I'm sharing my list of everyday garden essentials, and many of these essentials crossover to vegetable gardeners as well. If you plan on going for a full-scale, landscape garden on your property this year, these will be items that may come in handy after the heavy duty digging and planting is complete.
Last year I prepared a variation on this post in a guest series on my friend Laura's blog, Decor to Adore. I'm expanding a bit on that post, and updating with links to some of my favorite garden essential items. No compensation is being received for any of the items recommended.

My number one garden essential, hands down, is a good pair of gloves.  Although there are plenty of options and price points out there to choose from (the photo below was taken in a small town hardware store), I prefer a good grip kind, such as these, for most of my work in the garden. The rubber palm and breathable, nylon topside are a winning combination, providing good water, chemical and dirt coverage for fingertips, yet flexible enough for handling seedlings. They wash and dry well also. For dealing with tougher jobs such as thorns, I switch to (and recommend) leather or leather-like gloves, a more impenetrable choice.
Garden gloves
Second on my list of garden essentials is a trusty pair of snips, pruners, or plain ole knife or scissors.
Pruning snips
A pair of snips takes care of handling most dead-heading in the daily walk through the garden, and these are inexpensively found (less than $15 for a decent pair) at your garden or hardware store. You can tell mine are well-used (and dirty on the blades!). This pair has a safety catch for keeping the blades together when not in use. There's also a more frugal alternative to pruning snips - go to the Dollar Tree and purchase (when in stock, early in season) or a pair of scissors and/or knife!  Yes, they will do the job, and when the blades go dull or the tool(s) get lost in the garden, they're inexpensive to replace!  Knives are especially great for whacking down small grasses.  Alternatively, if you really get into your tools and some serious pruning, you can invest in a good pair of Felco No. 2 pruners.  Felco pruners are the workhorse tool in my arsenal, easily cutting through thick branches of mature plants and even trees, up to 1" in diameter.

Next on my list of garden essentials are good, basic hand tools. By all means, go straight to your nearest estate sale, and make a beeline for the garage. You're likely to find a whole host of hand tools at $1 or less for each! A spade, trowel, weeder, hand cultivator - all of these are good to have for various tasks. And don't worry about the rust - rid the rust with Evapo Rust - available at Advance Auto, Lowe's, or Amazon. Spraying WD-40 and scrubbing with a Scotch-Brite sponge can also work to rid rust on hand tools. Prevention is the best medicine - clean, dry and store your hand tools after each use.
Hand tools scored at an estate sale for $1 or less each
The bonus in finding hand tools at an estate sale is you may even have a little piece of art in the handle (careful, you'll be tempted to use as decor!).
Hand tools as sunroom decor
There are a couple other handy tools for the gardener that I personally consider essential, but one can certainly do without. The first is the hand rake (shown below), which is great for working under shrubs to clean up leaves and trimmings. Not as easy to find at estate or yard sales, it costs just under $10.

The second handy, not so common garden tool is the yard butler (below). This is a great tool for removing weeds, such as dandelions and wild violets. You simply center the bottom prongs over the weed center, push down on the foot pedal, and lift up the handle - your weed comes out, root and all. It runs around $30. 


Now that you're set with tools for the garden, it's time to enjoy it. What's all that work in the garden for if you can't share it and enjoy the show? Focusing on a playground for the birds, I've come to find a low-to-the-ground, sturdy concrete bird bath as a garden essential - a $30 purchase at my local Feed and Seed store. I have several birdbaths throughout my garden, but have found my bird visitors love that first one I ever bought the most.  I always locate the birdbath near a perch (trellis in my garden) and near protection (between thorny rose bushes and tall magnolia).  I store it away during winter months to keep it from cracking during freeze-thaw weather.  A large, clay pot saucer is an alternative to a concrete birdbath, and it's about half the cost.
Pool's open!  Robin in birdbath, early Spring, before hibiscus are full-grown
View of same birdbath, nestled among mid-summer, full-grown hibiscus, rose bushes and magnolia
Essential and critical to attracting the birds consistently is keeping the birdbath clean. I keep a watering can beside my birdbath to top off the loss of water from splashes and evaporation, and I keep an old kitchen scrub brush in the garage just for the task of cleaning. I simply hose the birdbath with the power nozzle, apply elbow grease with the brush, and rinse again with the power nozzle.  If there's a build up of algae (happens overnight with high humidity and/or rain in our region), I will use a drop of bleach to disinfect and scrub the birdbath, but use it sparingly and rinse well!

Lastly, to finish off my list of favorite garden essentials, I'd have to say it's my Poison Ivy Soap. In the long list of protective garden arsenal, I think my poison ivy soap deserves a mention here. That's not to say that sunscreen and hand lotion aren't high on the list, but if you've ever had poison ivy, you can empathize (and my first bout with the stuff was when I was 40). I use this soap, faithfully, immediately after being in the garden, from my hands to elbows and feet to knees.
Poison ivy soap and nail brush, as a preventive approach
Gardening can really be as little or as much as you want it to be, so go, get outside!

Here is a list from this post, recapping the garden items and links to items I consider essential:
Good pair of gloves and/or
Leather or leather-like gloves
Pair of snips and/or 
Felco No. 2 pruners
Estate or Yard Sale hand tools (spade, trowel, hand cultivator) and/or Dollar Tree finds
Hand rake
Yard butler
Low-to-the-ground, sturdy concrete bird bath, watering can, and scrub brush (check local feed and seed store, estate and yard sales)
Poison Ivy Soap
Optional: Evapo Rust

There are certainly other garden items I use regularly and love - my rain gauge to judge watering needs, birdfeeders (hummer in summer, nyjer and/or sunflower in winter), and stakes and ties for tall-stemmed perennials and vines - but I could live without them if I had to. How about you - what do you consider your garden essentials? Are you a landscape gardener and/or vegetable gardener? Have you already started working on your list of yard chores? I'd love for you to spill the dirt with me.

Thanks for your visit!
Rita C. at Panoply
Here on my blog, I have several more garden-related posts. If you're interested, you can type 'garden' into the search box just above my profile picture on the sidebar, and a list of related posts should come up. I ♥ my garden!

Sharing with any given number of these fine hosts:

Sunday, April 6, 2014

Landscape Plan: Lessons Learned, Pitfalls to Avoid

In a related post, "Landscaping: Plan Your Garden, Garden Your Plan", I talked all about how my husband and I began our landscape garden with an exterior renovation project in 2004.  In case you're jumping into a landscape project this spring, or planning one sometime in the future, these two posts may be quite helpful to you, especially if you want to do the work yourself.  This post is a look at our garden now, ten years after the initial planting, along with a summary of lessons learned and pitfalls to avoid from the project.

Just to recap:  The house and garden lots, combined, are approximately 100' wide, and 100' deep; the main garden is about half of that total space, or 50' x 100'.

Below is a photo of the mature landscape from within the brick wall, looking from the farthest back corner of the yard, 2013:
And here is the view from that same corner of the yard, just after planting in 2004:
The front corner of the landscape, looking toward the next door neighbor's house, with azaleas and snowflake viburnum in bloom, spring 2013:
The aerial view of that same corner, spring 2005, just six months after the initial planting:
One of our specimen plants, the weeping cedar atlas, fall, 2013 (supports are for training the branches and all perennial underplantings had been cut down and cleaned out):
During winter 2014....
And the weeping cedar, just after planting, spring of 2005:
Our magnolia, summer 2013:
The magnolia, spring 2005, following initial planting (not even as tall as the trellis next to it):
As I mentioned in the post prior, the main lesson learned in planting a garden is to plan your garden and then garden the plan you settle on.  In other words, make a plan, lay it out on paper and/or the dirt.  Below are more of our top lessons learned and pitfalls to avoid that may save you money.
  1. Make a budget and know how much you want to spend on landscaping.  Landscaping is not for the faint of heart - it requires work, so either plan on doing the work yourself, or plan for landscaping service in your budget.  Don't forget to plan the maintenance - it is time-consuming, and time is money; therefore, plan to spend one or both.  Even container planting can be expensive, so plan accordingly. Also, landscaping maintenance is ongoing, so while the initial planting is a one-time expense, the maintenance is recurring.
  2. Save any dirt you dig (unless your earth is full of rock, but, seriously, even consider the rocks for landscaping also)!  We had a lot of dirt turned over for the very first time, and it was rich, river bottom soil.  We made a HUGE mistake of letting much of it be hauled away once excavated (because it was inconveniently in the way of construction), only to have to pay for dirt to be hauled back in once landscaping was finished.  It was not the same rich dirt.
    Footers dug, with excavated dirt positioned for re-use
  3. Do some research, either your own or by paying someone (landscaper) to do it for you.  We did both - we hired a landscaper, and I did a lot of research on ideas I had and on those suggested by the landscaper.  Read magazines, search the internet, visit nurseries - either big box or small businesses - you can get a lot of information by engaging in conversation with managers / employees. You need to know how big a plant is expected to grow in its maturity in order to optimize your land and your budget.  
  4. Learn which plants thrive in your conditions, and 'think green' by selecting plants that are native to your growing region.  Learn your USDA hardiness planting region, your landscape's sun exposure (shady, part sun, full sun), and learn your soil type (see #6). This knowledge is power, and will save you money in the long-run by making smart selections.
  5. Google "master gardening ____", wherein _____ is your state, and you should see resources for university extension offices (with .edu as the suffix of the resource), an extremely valuable resource. For example: http://mastergardeners.ext.wvu.edu/ .  Within this resource page, depending on how your state is structured, there may links to local offices near you (for me, it's a county extension office).  These agencies offer more information than you could ever need as a casual gardener, but also offer programs for certification to become a master gardener.  I became a certified master gardener a couple years after my garden was established, in order to better understand my own garden, but could have used the information sooner.
  6. Have your soil tested before planting.  Your local extension office (see #5) will typically do this service free of charge, and it can save you a LOT of money before investing in plants that simply won't thrive in your garden.  It is best to take several samples from all around the yard to have tested, as soil composition can vary greatly around the landscape.
  7. Plan for utilities in your landscape before you plant.  Does your current set up take into account planned lighting and water needs? We mitigated this issue by extending our utilities throughout the property, both water supply and electrical. One of the smartest things we did was to run the utilities under our road, across the street, to reach our river property, in the event we wanted to build a dock or gazebo in the future, or for immediate, general maintenance.
    Underground utility conduit, run under the road, from main property to riverbank, for future development
  8. You don't have to plant everything at once; your garden can be installed in phases.  Phasing in your landscape not only helps in budgeting, but allows the opportunity to test the experience to see if it's worth your investment. Adjustments to the plan can be made more easily with a phased approach. Do you want more hardscape such as rock paths or walls, benches or chairs, a trellis, gazebo or pergola and less plantings, or vice versa?  
  9. Once your garden is planted, be aware that changes are inevitable.  For us, our region was rezoned eight years after initial planting from zone 6 to zone 7 (more moderate to more southern & tropical)! Our biggest and most costly pitfall here was in losing three white birch trees in our landscape.  They were marginally rated for our area before the rezoning, we took a chance, and eventually all three succumbed to birch bore.  Not only did we lose established shade growth in the landscape, but we lost specimens with year-round interest (the bark is beautiful all year). But when you have lemons, you make lemonade, so the cut birch logs are now part of my indoor decor.  The point is to go with the flow of nature (while paying attention to point #4, above). 
    Interesting, paper bark of white birch tree amidst a massing of white anemones
  10. Sometimes you'll get more than you bargain for with your plants - sometimes planned, other times not planned. Good examples of planned bargain are with liriope (commonly referred to as monkey grass), and several other perennial plants such as the anemones pictured above.  These plants multiply naturally in the garden, so if you want to exercise patience and a phased approach, you can divide your plants and replant in other areas of your garden (liriope), or you can let them reseed themselves (anemones).  Just remember, when you do plant, you want a careful balance in making a visible impact versus overplanting.  You want enough plants so that they are visible (massing), but you don't want to plant so many that they fight to survive, choking themselves out in competition for nutrients. Blooming eventually suffers and plants die when overplanted or crowded from years of growth or multiplying without division. An example of getting more than bargained (unplanned) is in choosing a hybrid plant variety. The maple tree variety pictured below was selected for the specific purpose of camouflaging the utility pole behind it (at the back of our property along the alleyway).   
    Maple tree viewed from inside yard, camouflaging utility pole outside center of brick wall in alleyway 
    The hybrid we selected was supposed to mature at about half of the typical 35-50' height of so many maples, but because hybrids don't always turn out to be what you think you've bought, you end up with something else (such as something closer to the root on which the hybrid variety was grafted to grow; in this case, a taller variety) - it happens.  Our pitfall in this hybrid selection is the added maintenance of having to trim the tree more often to avoid the power lines.  Continuous pruning may eventually hurt the tree's natural growth to where it could die and need to be replaced.
    Maple tree viewed from alleyway, outside of brick wall, with utility pole directly behind
  11. Gardening grows the spirit, and it also grows friendships. Once you start gardening, it becomes a springboard for conversation with neighbors and passersby.  Exchanging plants or gifting some of those divided plants is a sure way to befriend a neighbor, and you can also donate your divided plants to your local school or extension office for their fundraisers.  You can even sell your divided plants at your own yard sale to recoup some of your investment.  The overall reward and satisfaction of getting in the dirt, getting dirty, finding my happy place, and relaxing in the calm of the job well done is something words can't even adequately describe for me; it just is.
    Lilies purchased for tabletop decor, later transplanted into the garden for future flourishing
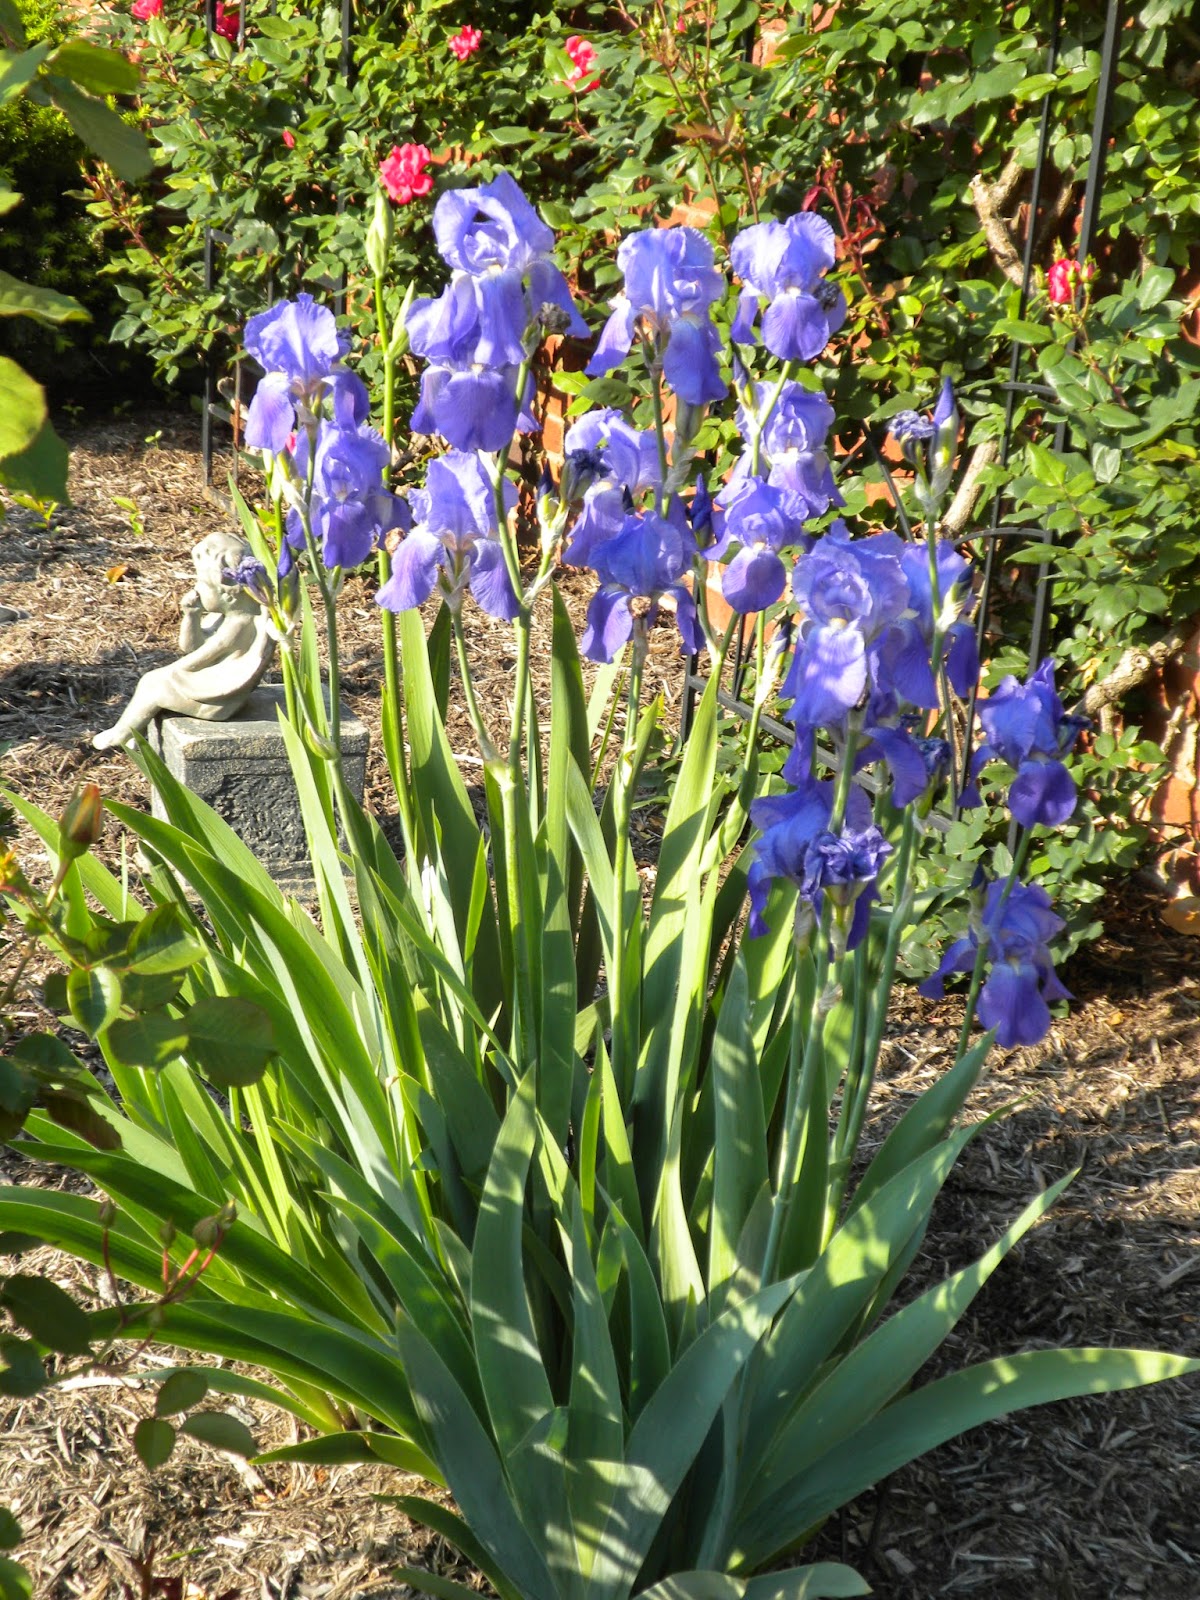
    Heirloom irises, divided by a friend, transplanted into my garden
  12. A mature and well-maintained landscape garden can up your curb appeal and increase your property value by up to 10% of comparable properties otherwise, according to web research.  Conversely, a poorly maintained garden can decrease your home's value, so know what you're getting into before embarking on landscaping your property, and be willing to commit to it.  
    First blooms of spring, front lawn
  13. Good fences make good neighbors - it's true.  If you don't live in city limits or a developed subdivision, this may not apply to you, but within city limits, it's nice to have a clear division between properties. While we value neighbors, we value our privacy, too. Landscaping can provide a fence itself, but the actual hardscape of a fence can keep out unwanted critters of various kinds.  Fences can also provide a sort of micro-climate within a landscape, helping to ward off damaging winds and extreme temperatures, acting as a shield around plantings.
  14. Journaling your garden is a great way to document the changes over the years to better understand fluctuations in the success & failure of plants.  Besides keeping the design plan, the tags from plants installed, and research on my plants, I even keep a monthly printout from the weather.com website that shows the actual temperatures and waterfall recorded at month's end.  The garden also makes for beautiful subject matter in photography, which complements the journaling.
    Garden in winter
  15. Be mindful that no matter how much time and money you invest in your landscape, stuff still happens. Plants get diseased, critters manage to interfere, and things do change. The good news is that the garden is ever-changing.  The lesson learned:  let the garden be.  It's a trial and error process.
    Lingering days of fall in the garden
I hope there's a takeaway or two for those of you reading this, along with the previous post, on landscape gardening. My intent was to share our plan design (just one of thousands), the experience, the lessons learned and the pitfalls to avoid, in the hopes that you'll save some time and/or money with your own plan. Your feedback is always welcome.

If you'd like to see more of my garden, here are a few other related posts from the past year with many more photos, all previously published:
Gardening Grows the Spirit 2012
Collected Cast of Characters in My Garden
Here's What's Blooming in My Garden Now
A Walk in the Garden Today
Plan Now! Annual Flower Container Ideas
I also invite you to follow My Garden Board on Pinterest, which has a fairly good following, if you prefer that method of media interaction.

(Thank you to Dwellings, the Dedicated House and Creative Country Mom for featuring this post!)

I link and party with any given number of these fine hosts:

Monday, July 23, 2018

Art Walk in the Garden

Hello, everyone! If you're visiting today via Amber's blog post at Follow the Yellow Brick Home, welcome! Today I'm participating with a group of fellow bloggers, taking you through my garden, sharing my touches of vintage decor interspersed throughout my landscape. A quick stroll through my Zone 7a garden is one of the things I love doing early each morning in the growing season, especially summer months. I like adding artful objects among my plants, but try to use restraint so it doesn't appear as clutter (like someone's yard sale). Let's have a walk around and I'll show you what I mean. It's an art walk in the garden!

Mixed floral wreaths are my favorite way to add color on the front porch of the house. For the adjacent landscape, I keep one large yard flag at the far back so it draws the eye from the street. I rotate my collection of flags through the monthly holidays.
Also on the porch is an antique cast iron urn in the corner, filled with either a plant or other seasonal decor. A metal orb and vintage sundial rest at the base of the urn. The urn is decorated with a couple of flags the last week of May and first week of July.
Below is my current view in late July of the East side of the garden, as seen through the garden gate. Knockout roses trained against the brick wall (L) are in their second flush. Dwarf butterfly bushes are now blooming in foreground, mounds of spirea just beyond, and butterfly bush tree forms in back. My limelight hydrangea is blooming behind the bench, and the flag is central to the landscape, with hostas at the base.
Opposite of the view captured above, another sundial sits on an antique concrete pedestal in a now open area where an azalea was previously situated (transplanted this past spring further left). The pedestal is now situated among a wood  and copper tuteur (with clematis in bloom, in the background), and a hand-blown glass orb on a copper pipe with forged leaves. 
At dusk, the orb lights up with all the other landscape lights, and gives the illusion of a low-lying moon in the front garden.
This year I added a hand-thrown pottery totem in the garden, with a single frog prince sitting on a lily pad. The artist who created it also makes other clay ornaments which can be stacked additionally on the metal stake for a true totem, but I used my "less is more" restraint here.
I like how he peers among the Otto Luykens shrubs behind my Summer and Fall seasonal cherubs.
Pictured below are the other seasons - Winter and Spring - in the summer garden. 🙂 My four seasonal cherubs were sourced from a local antique store.
Ultimately, the frog prince ended up on one side of the front annual flower beds, peering behind the boxwoods. I wanted to be able to see him as I come and go through the front door. The same is true for seeing a cast iron bunny which rests on the stoop on the other side of the front beds. Both are hardly visible to passersby, unless they're looking really closely.
My favorite little guy in the garden reads all day, every day. I received him as a gift more than 10 years ago, and I named him Augustine. He's a brut at just 3 feet tall and 250 pounds!
The art doesn't end in the garden. Even though my sunroom is architecturally enclosed, that part of my house is really an extension of the outdoors with an all-glass ceiling and French doors which open to the outdoor courtyard. I have a collection of garden items, and keep several in my sunroom on my baker's rack, some year-round. The antique seed box on the bottom shelf was an auction win/purchase several years ago. Recently harvested lavender dries from hooks on the top shelf.
The water pail on my baker's rack with a string of lights pouring from the spout is a new look this summer.
This little cast iron bird on branch has been perched in a birdbath and also used as a doorstop before, but right now it rests on a shelf with a small nesting pocket and scrabble tiles stating the obvious.
On the sunroom floor beside the baker's rack are a couple found crates, filled with random garden tools I pick up at [mostly] estate sales. At any time these tools may be placed in service. I just like collecting them for their shape, trademarks, handles, cost (cheap!) - all these reasons, as if I needed one.
Back outside, through the French doors of the sunroom, a couple more water pails are kept in the courtyard, mostly for replenishing the birdbath on hot days, and for gentle watering of transplants. The abandoned nests were extracted in early July from the courtyard roses.
The birds were smart when they built their nests against the brick wall, behind the thorny climbers. One was on the far left climbing rose in the photo below, the other on the far right. At the base of these roses (archive photo from May), you can see a few pieces of yard art (L to R): dancing frogs, my rain gauge, my Bunny Van Gogh, a small birdfeeder, and a wind chime hanging on the light fixture.
By July, most of this art at ground level can hardly be seen for the lavender growth.
Another area of knockout roses are planted in the front garden and are blooming for the second time this season.
Just behind these roses are the Lord Baltimore hibiscus plants I did not stake for the first time in this garden's history. They're still blooming, and can be seen from inside the house, but not visible from beyond the roses.
That's okay, though, because the birds still love the privacy the plants provide while bathing in their favorite birdbath of mine, just behind the roses and at the edge of the hibiscus. I caught these two robins from just inside the garden gate, taking turns jumping in.
One of my new favorite flower beds is on the west side of my landscape. Against the wall I have a large specimen plant, a Weeping Cedar Atlas (you can read more about it by clicking on the link). In front, I have (L to R) coneflowers (transplanted last year), zinnias (planted this year from seed), years old salvia and black-eyed Susans, all in repeat plantings, with barely visible sedum (Autumn Joy) as bookends in the flower bed.
A broken zinnia flower stem after a rainstorm inspired me to cut more flowers in the garden, and make the bouquet pictured below. This is one of the very best perks of having a garden, and there's no better art than God's beauty in nature!
An overhead view of the flower bouquet: a rose in bloom with bud on stem, coneflowers, black-eyed Susans, the single zinnia, limelight hydrangeas, and butterfly bush stems. A virtual bouquet, from me to you!
I'll leave you with a shot of my guardian angel in the garden. He's a thumbsucking cherub, perched on one of the brick fence posts and looking west, over the landscape. In the background is an age-old, very tall sassafras on our riverbank, with the city hills beyond as its backdrop. A little slice of heaven in the city. I hope you enjoyed this little artwalk through my Zone 7a garden today.
Postscript 7-25-18:
I have added a video walk through of my garden, taken on the evening this post was published (July 23, 2018). I've added commentary, noting some of the plantings and pointing out a few of the hardscape mentioned in this post. I hope you enjoy it.

I'd like to thank Amber from Follow the Yellow Brick Home for organizing this group of bloggers with a tour of our vintage gardens, whether it be flowers, vignettes or both. I hope you enjoyed your art walk in my Panoply garden. Next on the garden tour is Laura at Decor to Adore. I know you'll want to spend time visiting her, as well as the other bloggers on the tour, and you can easily do that with by clicking on the picture links conveniently located below. Enjoy the tour!

If you're new to my blog, I hope you'll join in the conversation with a comment so I'll know you were here. If you enjoyed this art walk in the garden, you may enjoy my latest post of closeups of the plantings in my summer landscape, here. Feel free to browse my menu bar (on my main web page, just beneath my header), or use the search button on the sidebar, just below the labels, which you can also scroll through to see my main topics. Thanks for your visit!

Lora B. Create and Ponder | Beauty For Ashes

As always, thank you for your visit!
Rita C. at Panoply


Sharing: Pieced Pastimes, Best of the Weekend, Amaze Me, DIDI, BNOTP,  Inspire Me, Make it Pretty, The Scoop, Dagmar's Home, Celebrate Your Story,Garden Party, SYC, Delightsome Life H&G, Grace at Home, Vintage Charm

An InLinkz Link-up